Vue Render Function
1.渲染过程
Template => Render Function => Virtual DOM => Actual DOM
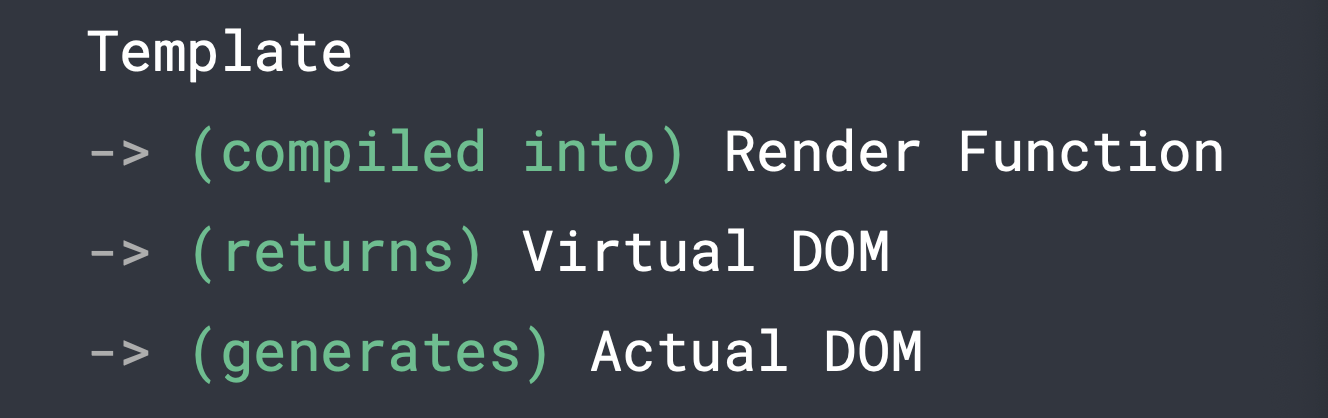
Template => Render Function
两种编译模式:
- 把模板直接传入Vue实例,Vue执行完整的编译,打包时连同编译器打包,压缩后约30KB
- 使用Vue CLI构建项目,用到webpack与vue-loader,vue-loader会预编译,压缩后约20KB
Render Function => Virtual DOM
渲染函数返回虚拟DOM
Virtual DOM => Actual DOM
Vue基于虚拟DOM生成真实DOM
2.虚拟DOM
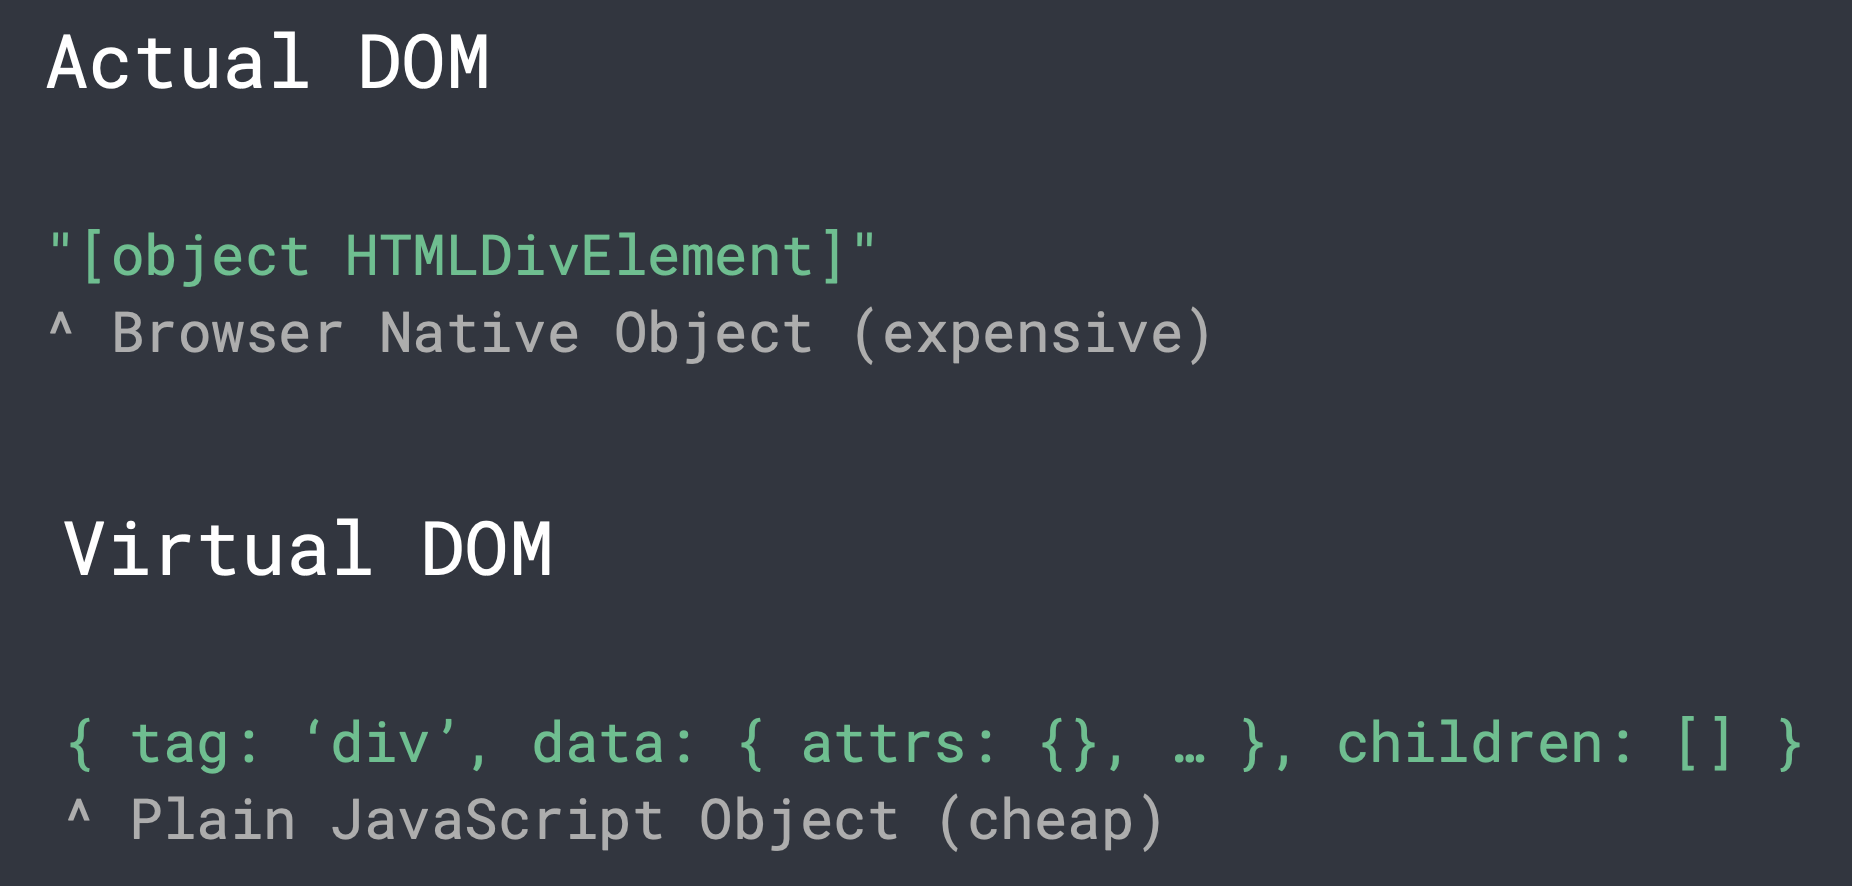
真实DOM的节点与虚拟DOM的节点是一一对应的,虚拟DOM使用一个JS对象来表示真实DOM的一个Node,而操作JS对象远比操作DOM节点更加简单。
数据或视图发生变化时,Vue会比较变化前后虚拟DOM的不同点,根据虚拟DOM的不同点来更新真实DOM。
使用Vue Template Explorer可以查看渲染函数(查看Vue是如何转换虚拟DOM的)。
https://template-explorer.vuejs.org/
<!DOCTYPE html>
<html lang="en">
<head>
  <meta charset="UTF-8">
  <title>quickFixIndent</title>
</head>
<body>

<div id="wrapper">
  <header>
    <textarea placeholder="before" id="before"></textarea>
  </header>
  <main>
    <input id="number" type="text" placeholder="indent number" value="2">
    <button onclick="solve()">Get!</button>
  </main>
  <footer>
    <textarea placeholder="after" id="after"></textarea>
  </footer>
</div>

</body>
</html>
import { createCommentVNode as _createCommentVNode, createElementVNode as _createElementVNode, Fragment as _Fragment, openBlock as _openBlock, createElementBlock as _createElementBlock } from "vue"

export function render(_ctx, _cache, $props, $setup, $data, $options) {
  return (_openBlock(), _createElementBlock(_Fragment, null, [
    _createCommentVNode("DOCTYPE html"),
    _createElementVNode("html", { lang: "en" }, [
      _createElementVNode("head", null, [
        _createElementVNode("meta", { charset: "UTF-8" }),
        _createElementVNode("title", null, "quickFixIndent")
      ]),
      _createElementVNode("body", null, [
        _createElementVNode("div", { id: "wrapper" }, [
          _createElementVNode("header", null, [
            _createElementVNode("textarea", {
              placeholder: "before",
              id: "before"
            })
          ]),
          _createElementVNode("main", null, [
            _createElementVNode("input", {
              id: "number",
              type: "text",
              placeholder: "indent number",
              value: "2"
            }),
            _createElementVNode("button", { onclick: "solve()" }, "Get!")
          ]),
          _createElementVNode("footer", null, [
            _createElementVNode("textarea", {
              placeholder: "after",
              id: "after"
            })
          ])
        ])
      ])
    ])
  ], 2112 /* STABLE_FRAGMENT, DEV_ROOT_FRAGMENT */))
}

// Check the console for the AST
3.渲染函数API
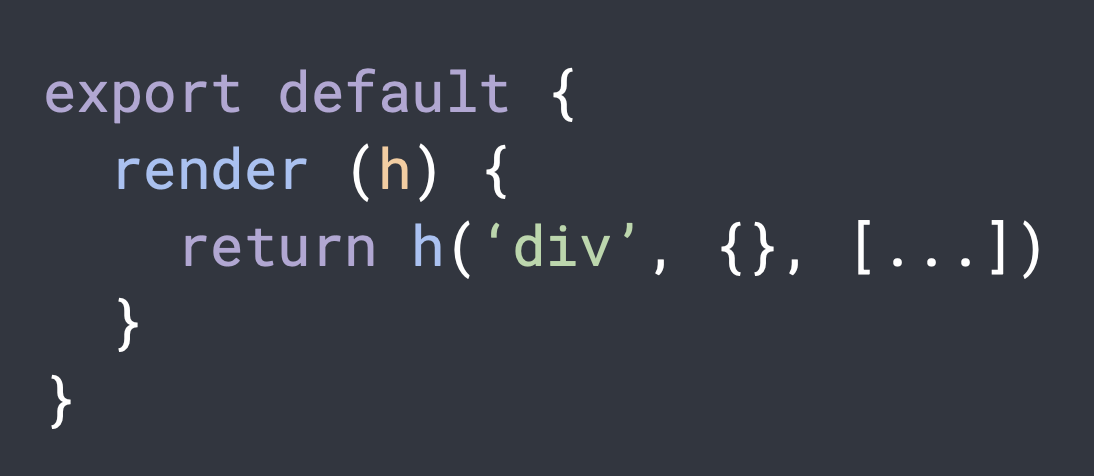
上图是调用一个渲染函数例子,render函数接收一个参数h, h只是一种约定的简写表示超脚本(HyperScript),他没有什么特殊意义,只是就像超文本我们叫HTML一样,只是方便书写的表示形式而已。
h函数接受三个参数,第一个是元素类型;第二是参数对象例如表示元素的attr属性,DOM属性之类的;第三个属性表示一些子节点,你可以调用h函数生成更多子节点。
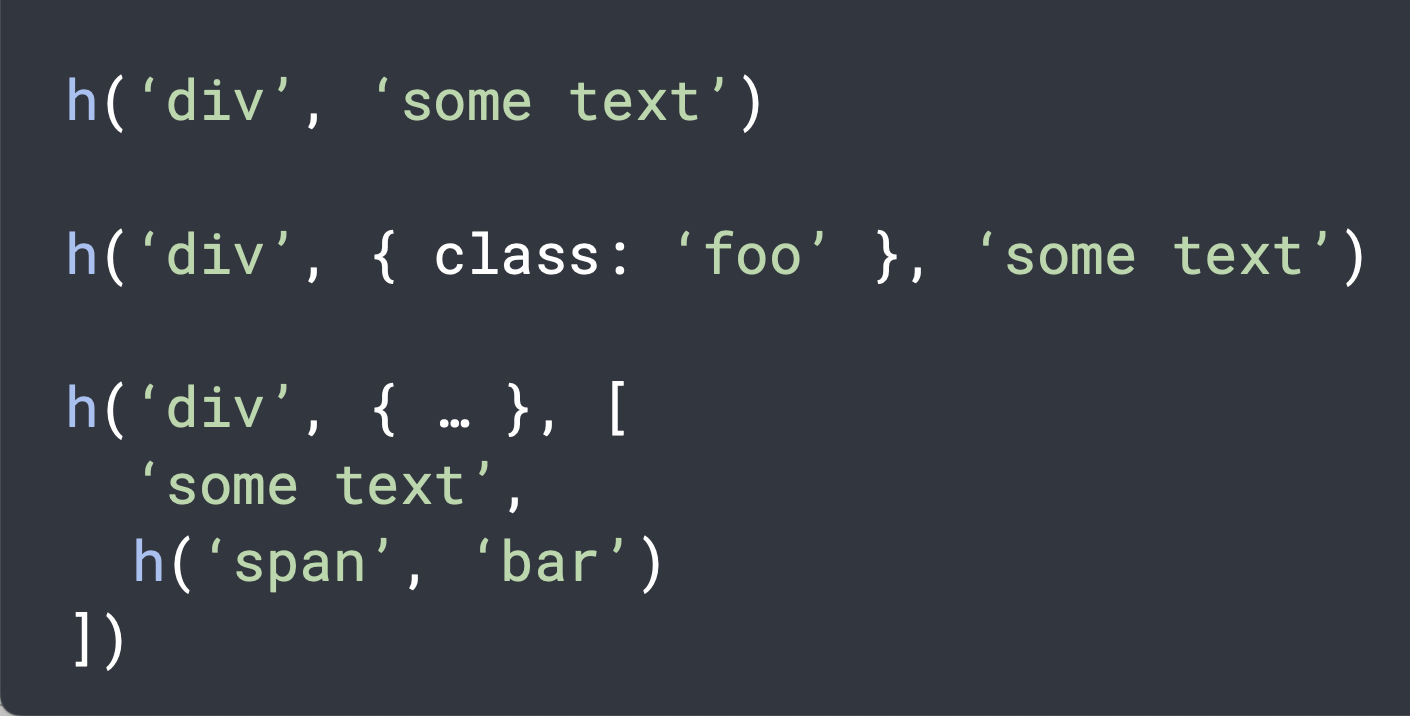
第二个参数是可以省略的,第三参数很灵活可以是数组(表示子元素)、单纯的文本(表示标签)以及组件变量名(表示组件)。
4.动态渲染标签
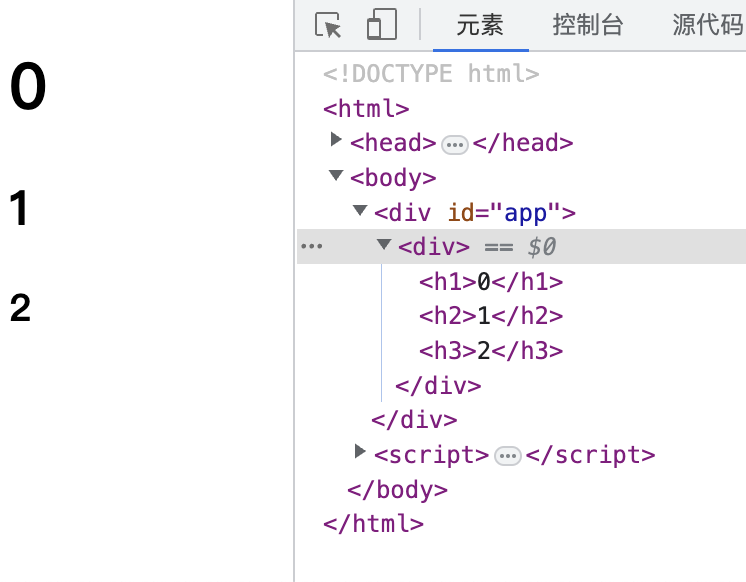
编写一个组件,组件根据tags属性在页面上输入相应的HTML标签
使用
document.createElement<!DOCTYPE html> <html lang="en"> <head> <meta charset="UTF-8"> <meta http-equiv="X-UA-Compatible" content="IE=edge"> <meta name="viewport" content="width=device-width, initial-scale=1.0"> <title>Document</title> <script src="https://cdn.jsdelivr.net/npm/vue/dist/vue.js"></script> </head> <body> <div id="app"> <example :tags="['h1', 'h2', 'h3']"></example> </div> </body> <template id="example"> <div> </div> </template> <script> Vue.component('example', { template: "#example", props: { tags: { type: Array, default() { return []; } } }, mounted() { console.log("mounted"); console.log(this.$el); console.log(this.tags); this.tags.forEach((tag, index)=> { let element = document.createElement(tag); element.innerHTML = index; this.$el.appendChild(element); }); } }); new Vue({el: '#app'}); </script> </html>
使用component标签
<!DOCTYPE html>
<html lang="en">

<head>
    <meta charset="UTF-8">
    <meta http-equiv="X-UA-Compatible" content="IE=edge">
    <meta name="viewport" content="width=device-width, initial-scale=1.0">
    <title>Document</title>
    <script src="https://cdn.jsdelivr.net/npm/vue/dist/vue.js"></script>
</head>

<body>
    <div id="app">
        <example :tags="['h1', 'h2', 'h3']"></example>
    </div>
</body>

<template id="example">
    <div>
        <component v-for="(tag, index) in tags" :is="tag">{{index}}</component>
    </div>
</template>

<script>
    Vue.component('example', {
        template: "#example",
        props: {
            tags: {
                type: Array,
                default() {
                    return [];
                }
            }
        }
    });
    new Vue({el: '#app'});
</script>

</html>
使用渲染函数
<!DOCTYPE html>
<html>
<head>
    <meta charset="UTF-8">
    <meta name="viewport" content="width=device-width, initial-scale=1.0">
    <title>动态渲染标签</title>
    <script src="https://cdn.jsdelivr.net/npm/vue/dist/vue.js"></script>
</head>

<body>
    <div id="app">
        <example :tags="['h1', 'h2', 'h3']"></example>
    </div>
</body>
<script>
    Vue.component('example', {
        props: ['tags'],
        render(h) {
            return h('div', this.tags.map((tag, i) => h(tag, i)))
        }
    })
    new Vue({ el: '#app' })
</script>

</html>
效果:
5.动态渲染组件
<div id="demo_4_6">
    <example :ok="ok"></example>
    <button @click="ok = !ok">toggle</button>
</div>
const Foo = {
    render(h) {
        return h('div', 'foo')
    }
}

const Bar = {
    render(h) {
        return h('div', 'bar')
    }
}
Vue.component('example', {
    props: ['ok'],
    render(h) {
        return h(this.ok ? Foo : Bar)
    }
})
new Vue({ el: '#demo_4_6', data: { ok: true } })
6.渲染函数与响应系统
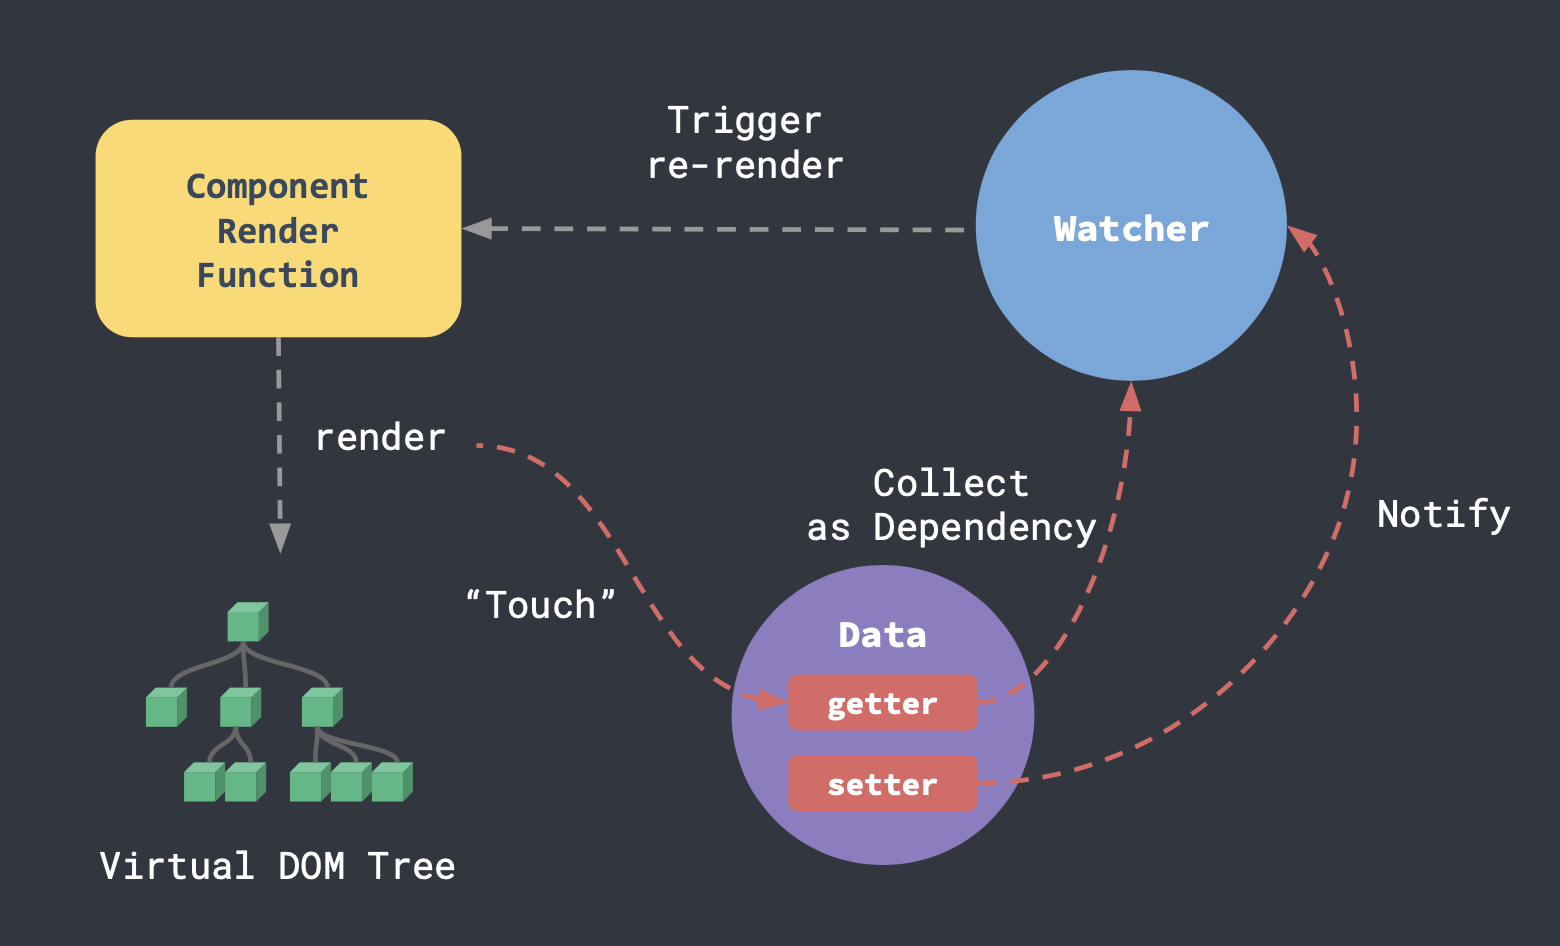
上图是Vue的响应性系统和渲染系统的运行流程,可以看到每个组件有自己的渲染函数,这个渲染函数实际上是运行在我们之前封装的autorun函数中的,组件开始渲染时会把属性收集到依赖项中,当调用属性的setter方法,会触发watcher执行重新渲染,因为渲染函数放在autorun函数中,所以每当data数据发生变化,就会重新渲染。
每个组件都有自己独立的循环渲染系统,组件只负责自己的依赖项,这一特性对于你拥有大型组件树时是一个优势,你的数据可以在任何地方改变,因为系统知道数据与组件的对应关系,不会造成过度渲染问题,这一架构优势可以让我们摆脱一些优化工作。